How to draw a butterfly
This drawing tutorial will teach you how to draw a butterfly. Once you learn to draw colorful flowers, your next step will definitely be an easy butterfly drawing. Spring brings not only the colors of beautiful mother nature but also numerous beautiful insects like a butterfly. Butterfly comes side by side with flowers or a complete garden, so you can also use them in your garden landscape drawings to make them more beautiful. Kids love chasing butterflies. It’s the beautiful colorful patterns on butterflies that make everyone a fan of butterflies. Butterflies represent the versatility of what nature offers.
Before drawing a butterfly, you can look for many photos of a specific butterfly species that you like to draw. Choose one anatomy and perspective of that butterfly at one time and practice it, then move to the other. Butterflies have more than 20,000 species, and each carries its own characteristics. A butterfly symbolizes hope and resurrection because of its ability to resurrect from a larva into a full-fledge winged insect.
Colorful butterflies
The wings of butterflies seem to be colorful. However, the fun part is their wings are actually transparent, and the surroundings blend in to give colors to the wings. Sensors in their feet that help them taste and have a short lifespan, merely a few weeks. Their wings are the most attractive parts of their bodies. Butterflies have only one tool to defend themselves from predators, which is their wings. The size and patterns on the wings keep most predators away.
You can find many guides on drawing a butterfly, but some will be oversimplified with no variety or detail. Then there is some over-complicated butterfly drawing tutorials with unnecessary details to confuse a beginner. Our tutorials teach you to step by step drawing a butterfly in the easiest way. We have included three categories of butterfly drawings, for beginners, for intermediates, and for advanced drawing. You can move to our more advanced butterfly drawing tutorials to practice more detailed butterfly drawings once you practice this one. Let’s go to the tutorials on how to draw a butterfly easily.
Step by Step Guide on How to draw a butterfly for beginners
If you’re a beginner, you can learn butterfly drawing from this tutorial. This tutorial can also be beneficial for butterfly drawing for kids as well. Get your pencils, sharpener, erasers, and paper to get started with this drawing. Let’s start with the first step.
Let’s with start how to draw butterflies step by step.
How To Draw A Butterfly
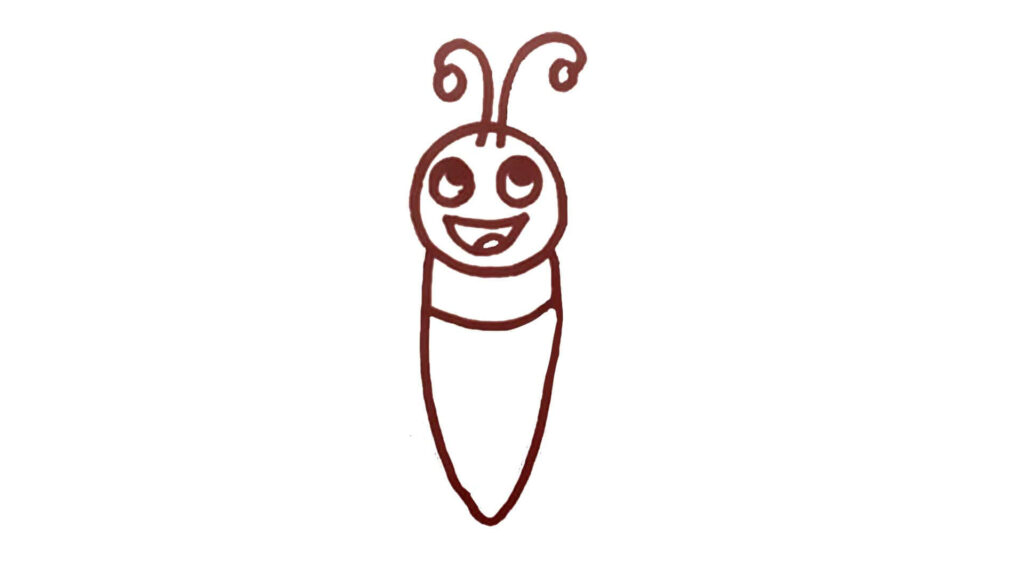
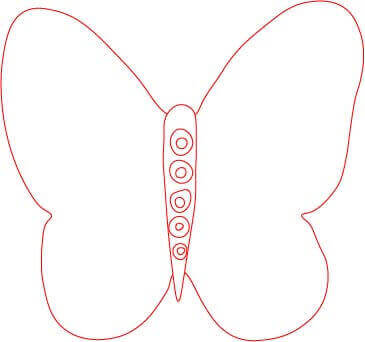
The very first thing to do is draw a circle to represent the butterfly’s head. Draw a small circle on the right and left sides to show the right and left eyes. Fill half of the eyes to make them realistic. Draw a small mouth and fill some part of it to make it look like it’s happy. Then draw two vertical lines on the head in the upward direction. Make those lines U-shaped at the end and add small circles at the edges of those lines. These two lines will represent antennas. Next, draw the abdomen or belly of the butterfly by starting a line below from one side of the head. Take this line to a considerable length, then add a V-shaped curve at the end, and then take the line back to the other side of the head. Add a horizontal line below the head to divide its belly into two parts.
Step 2: How To draw Butterfly wings
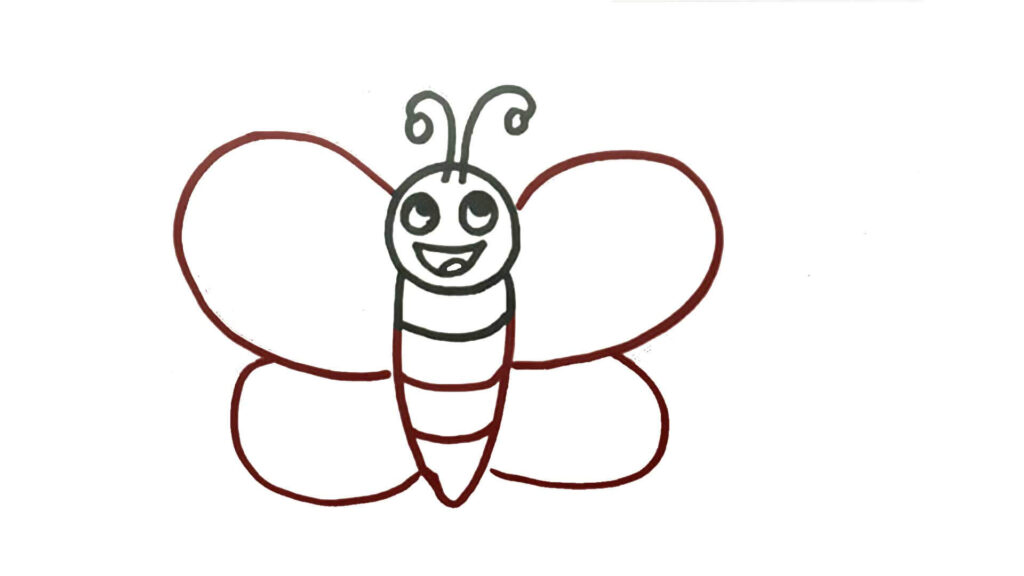
Add some more horizontal lines on the abdomen, just like a real butterfly. Next, draw fore wings (upper wings) and hind wings (lower wings) on each side.
Step 3: Now use Color on a smaller wing
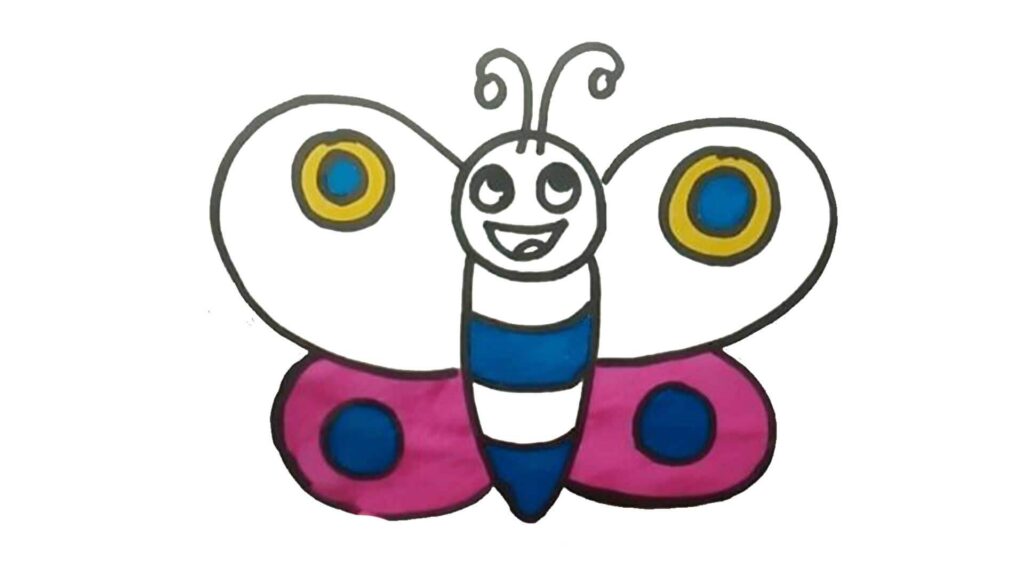
Next, draw circles on each wing. One smaller circle in each mid-size circle of fore wings. Then start filling in the colors in wings. Give pink color to the hind wings. And use yellow color in the circles in the forewings outer layer and blue color in the smaller circle. Use the same blue color to fill in the circle on the hind wings.
Step 4 Fill the color on the butterfly
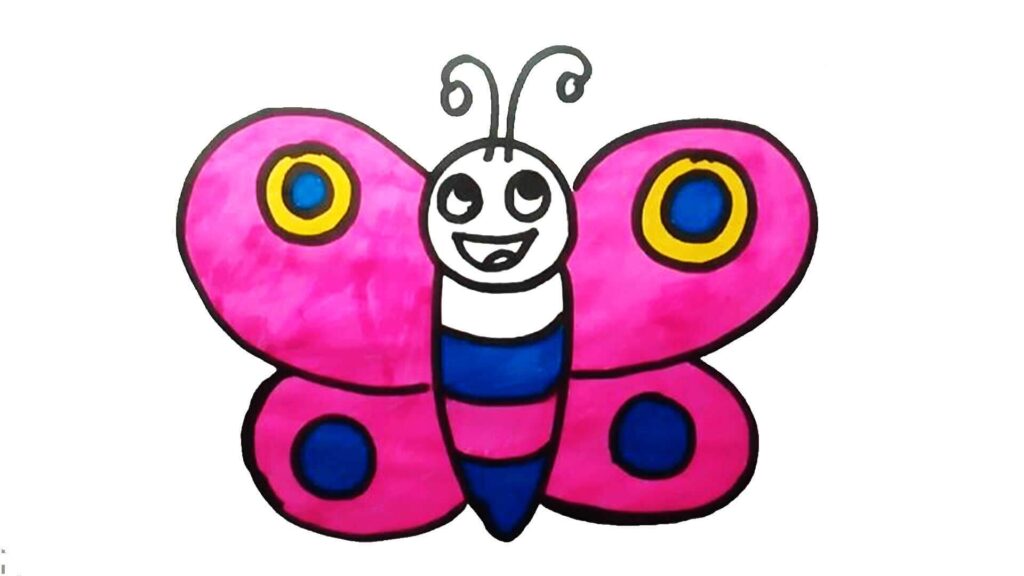
Fill the forewings with pink color as well. Then use blue and pink colors in the abdominal boxes to complete this drawing.
Step by Step Guide for intermediate butterfly drawing
If you have practiced both beginner butterfly drawing, then let’s move to intermediate butterfly drawing.
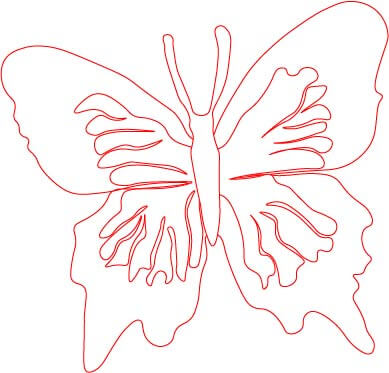
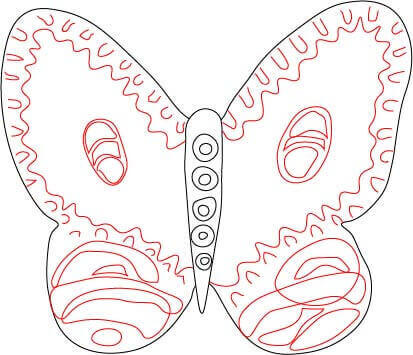
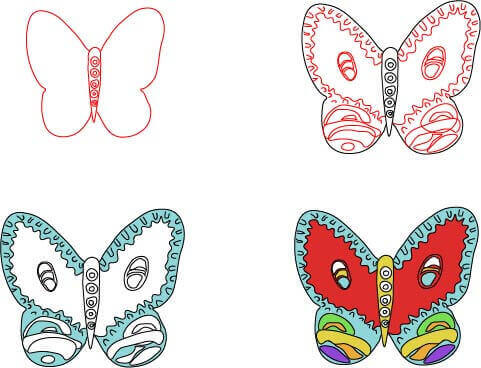
Step 1: Draw the body structures of butterflies. Start with drawing a cylindrical shape vertically with a U-shaped and V-shaped end which represents the body. Draw a circle on a U-shaped end to represent its head. Draw two antennas on top of the head. Then draw a curved triangular shape on the right and left sides of the body to represent forewings. Then we will draw hind wings. Start a curved line from the edge of the fore wing and go down. At the bottom, make a big semi-V and then a small U-shaped curve. After that, make this line meet at the edge of the lower body. Draw repeated patterns of wings with inner lines inside the wings to make them look more realistic.
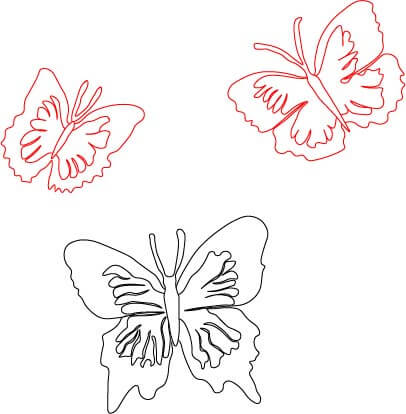
Step 2: Repeat step 1 and draw two more butterflies nearby. These butterflies can be of a size different than the first one, probably smaller.
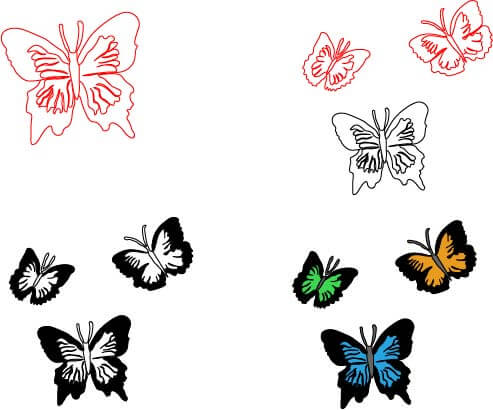
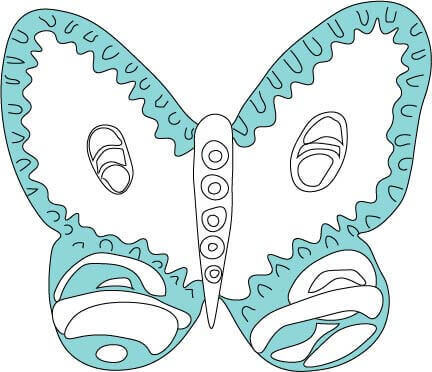
Step 3: Now, start using a black marker. Use a marker to fill the outline of the butterflies first. Then use the black marker to differentiate the wings with the wing patterns inside each butterfly.

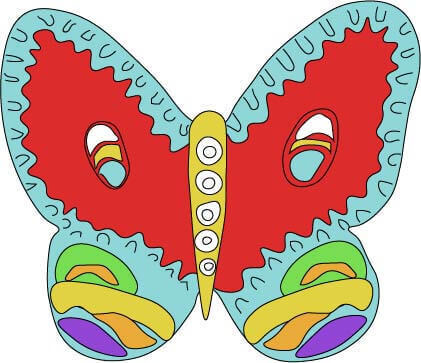
Step 4: Now, use blue to fill the first and biggest butterfly, brown and green, on the other two butterflies.


0 Comments